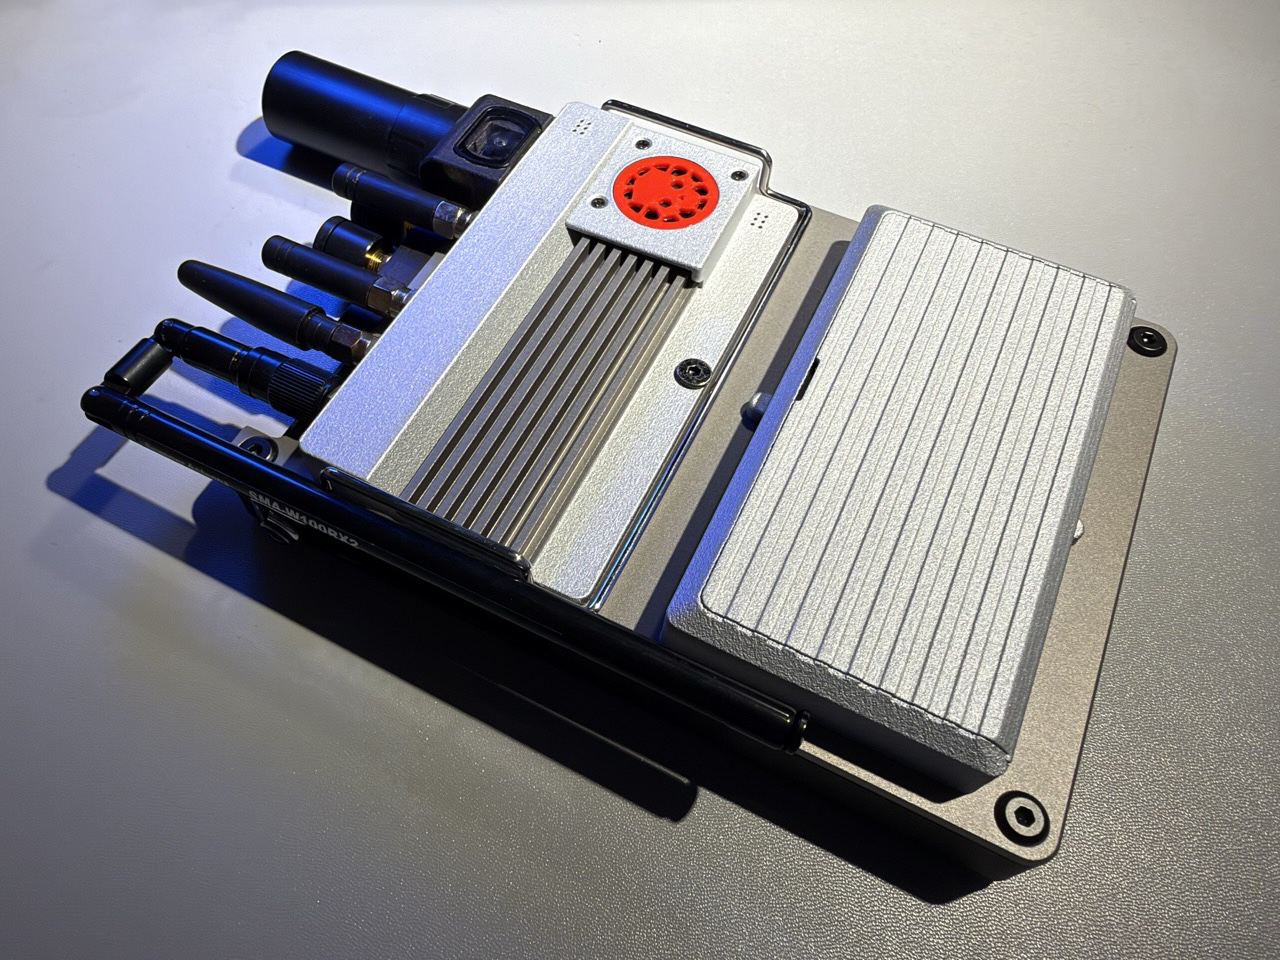
The Omega-Chassis: A Modular Backplate for the uConsole
Most hardware projects suffer from a specific kind of feature creep. In the world of modular electronics, there is a recurring temptation to equate “more” with “better”.
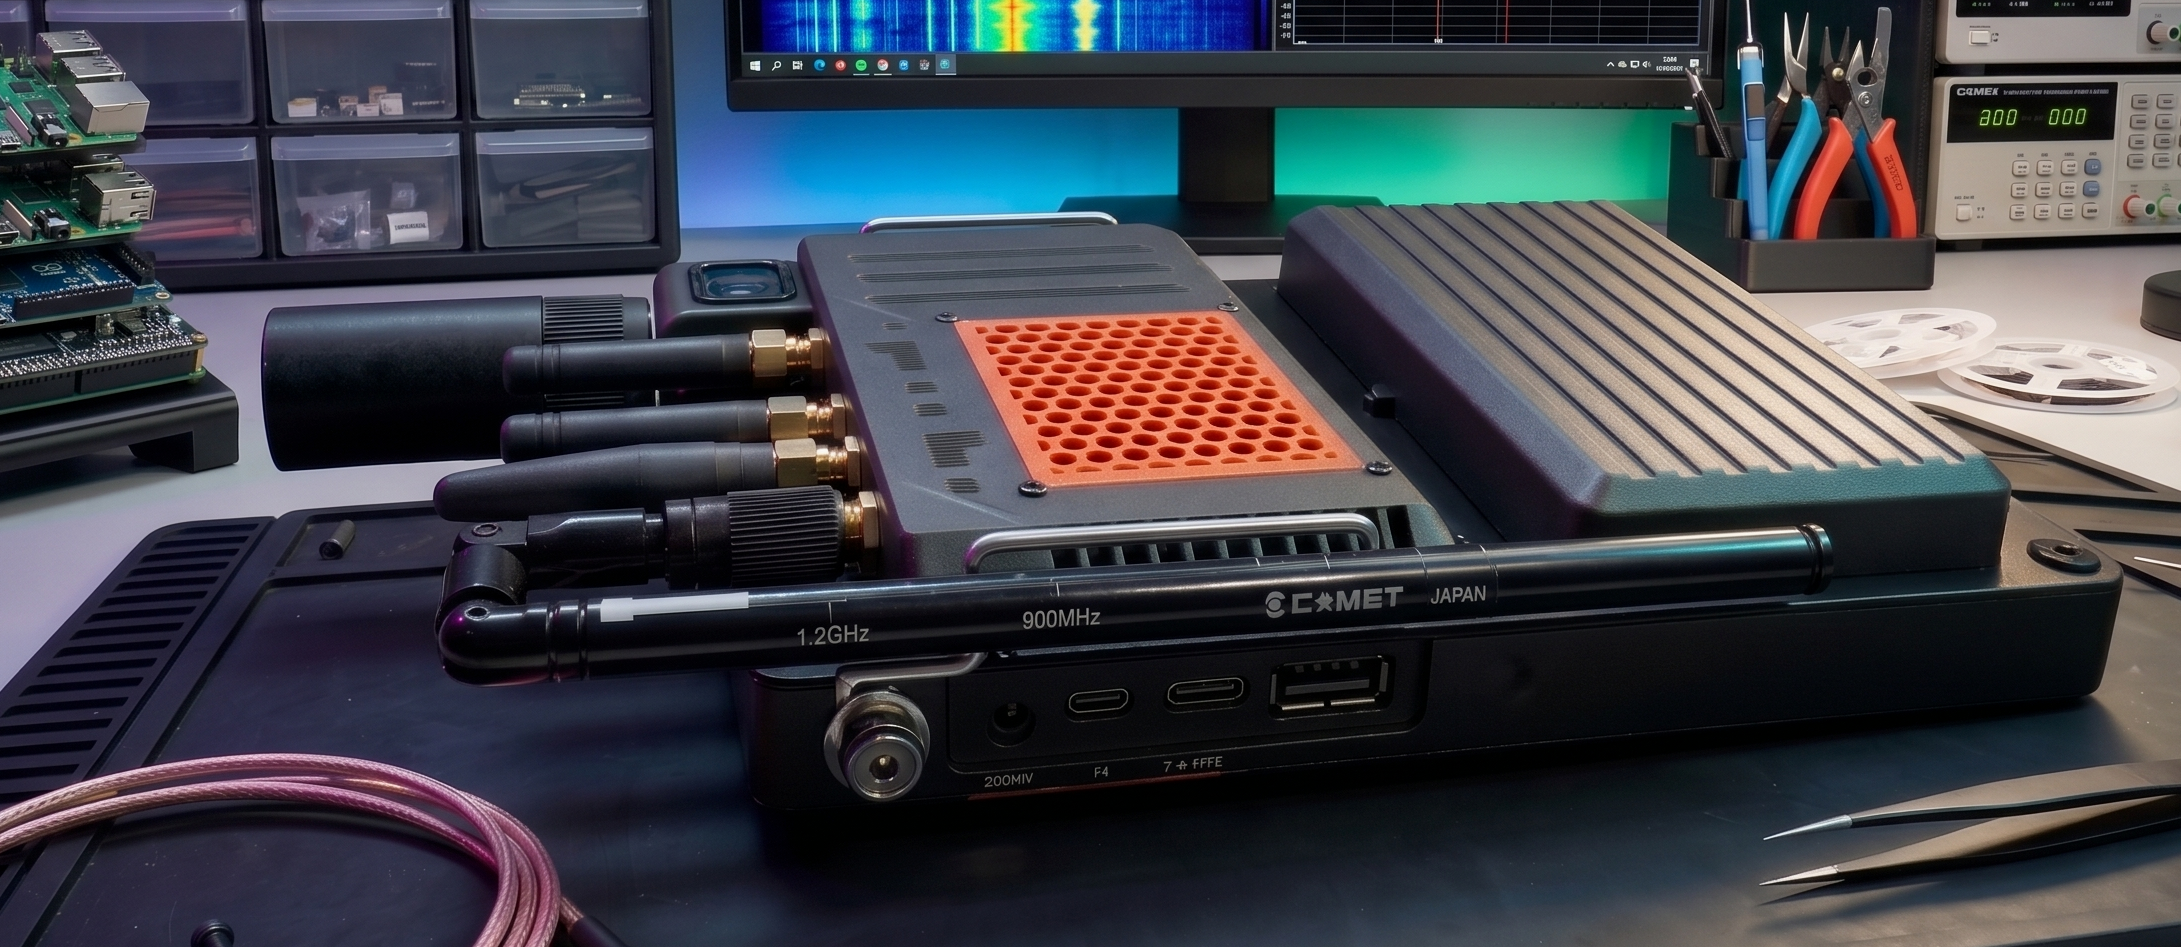
The uConsole has inspired a wonderful culture of maximalism. It’s a testament to the device’s potential that so many of us want to see exactly how far its capabilities can be pushed, often resulting in impressive “laboratory-style” builds featuring striking antenna arrays. These setups are a great way to showcase the raw power of the platform. The design challenge then becomes a fun one: finding a way to integrate that same spirit of high-performance expansion while maintaining the sleek, grab-and-go portability that makes the original form factor so iconic.
I’ve spent the last eight months trying to solve a different problem: How do you add maximum utility without destroying the original intent of the design?
Introducing the Omega-Chassis
The best tools are the ones that disappear when you use them.
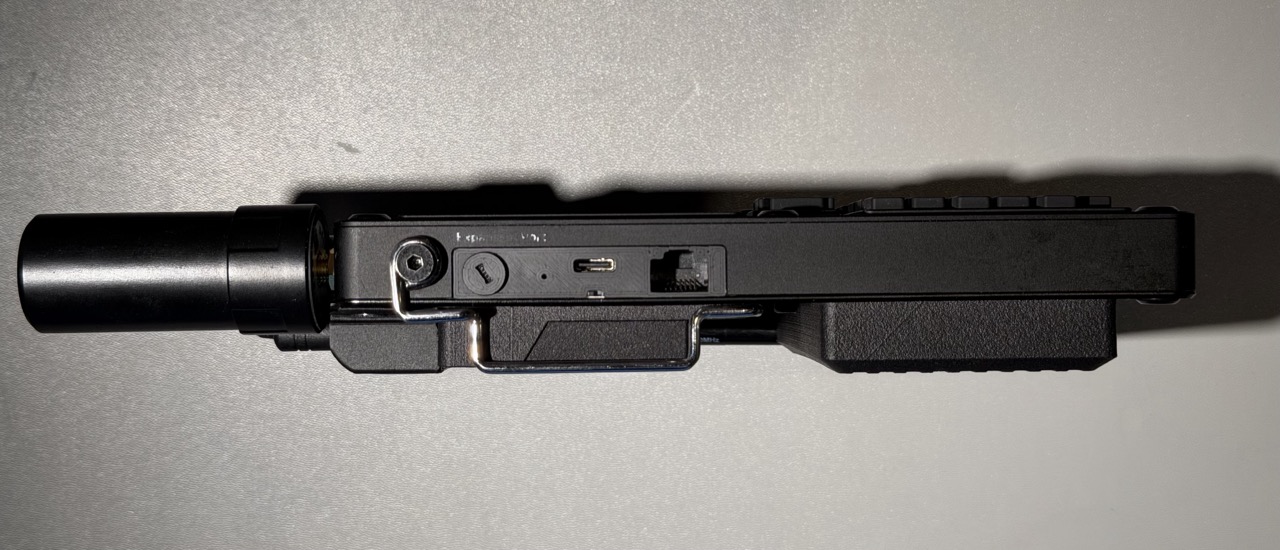
The Omega-Chassis isn’t just a backplate; it’s a way to turn a fantasy gadget into a daily driver. It’s for the person who wants a stable 10,050 mAh of power juice, active cooling, and a camera, SDR capabiliteis but still wants their device to fit in a travel bag with a sleek design.
What’s Included
- Two variations of the backplate: Ultimate or Essential model
- Both design supports all the common features, but each model has a different set of features to cater to different needs and budgets.
- A comprehensive part ordering guide (~15 pages)
- Cost optimized service for ordering CNC (30% cheaper than other services).
- Aliexpress/Amazon Links & images for parts and accessories required
- Exteme detailed instructions (~60 pages, ~100 guide images) for parts and assembling the Omega-Chassis
- An additional instruction and design files specific for the Essential variation build parts (~11 pages, ~18 images).
- 27 modular design files
- 7 customised fan grills design files for the Ultimate build, 2 fan grills for the Essential build (grill itself is free & open sourced)
- Community, general support channels and free future updates
Features TL;DR
- Triple 18650 Battery Support (10,500 mAh), and it is compatible with existing HackerGadgets NVMe battery board & AIO V2. (No complications, really baisc simple wiring soldering skill is more than enough).
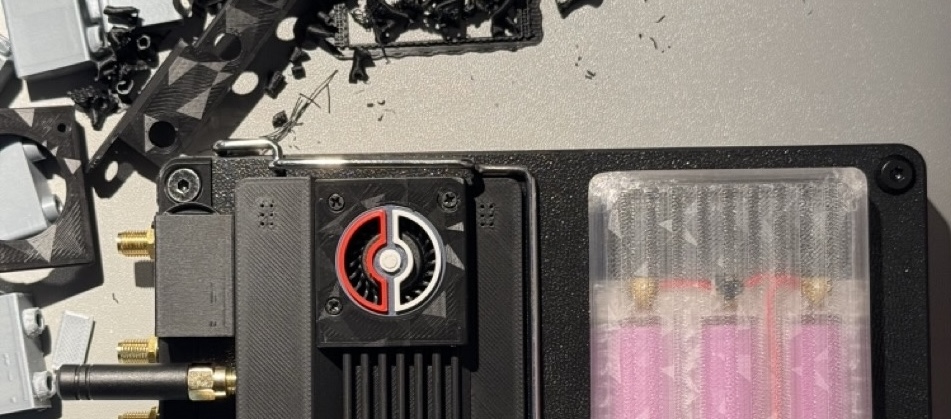
- Active Cooling System with a custom fan curve to keep the Compute Module 5 at a stable 55-60°C under load; Customizable fan cover to fit your cyber-aesthetic. (a fan curve setting that optmized for quietness & battery consumption rather than running and noisy all the time).
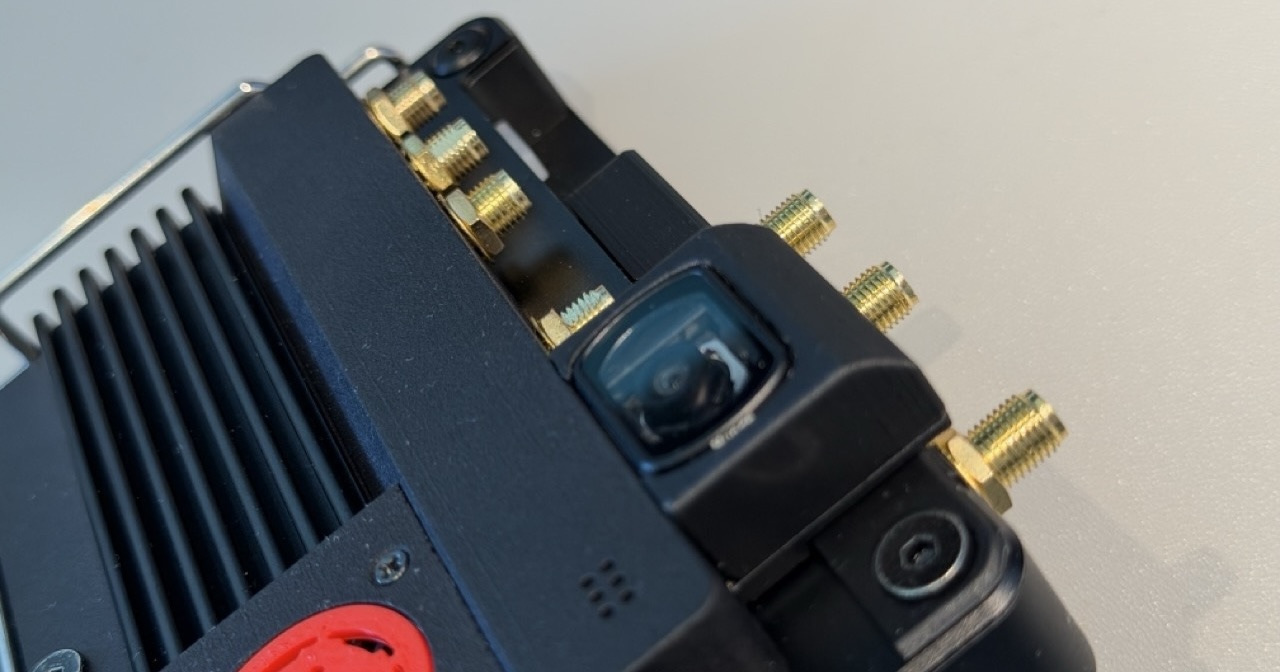
- Support for up to maxium 10 antennas while maintaining a compact form factor; With the camera or SD Card moddule, support up to 8 antennas.
- Special matrix holes for improved speaker clarity.
- Optional slot for a Raspberry Pi Camera V3 or extra Micro SD storage.
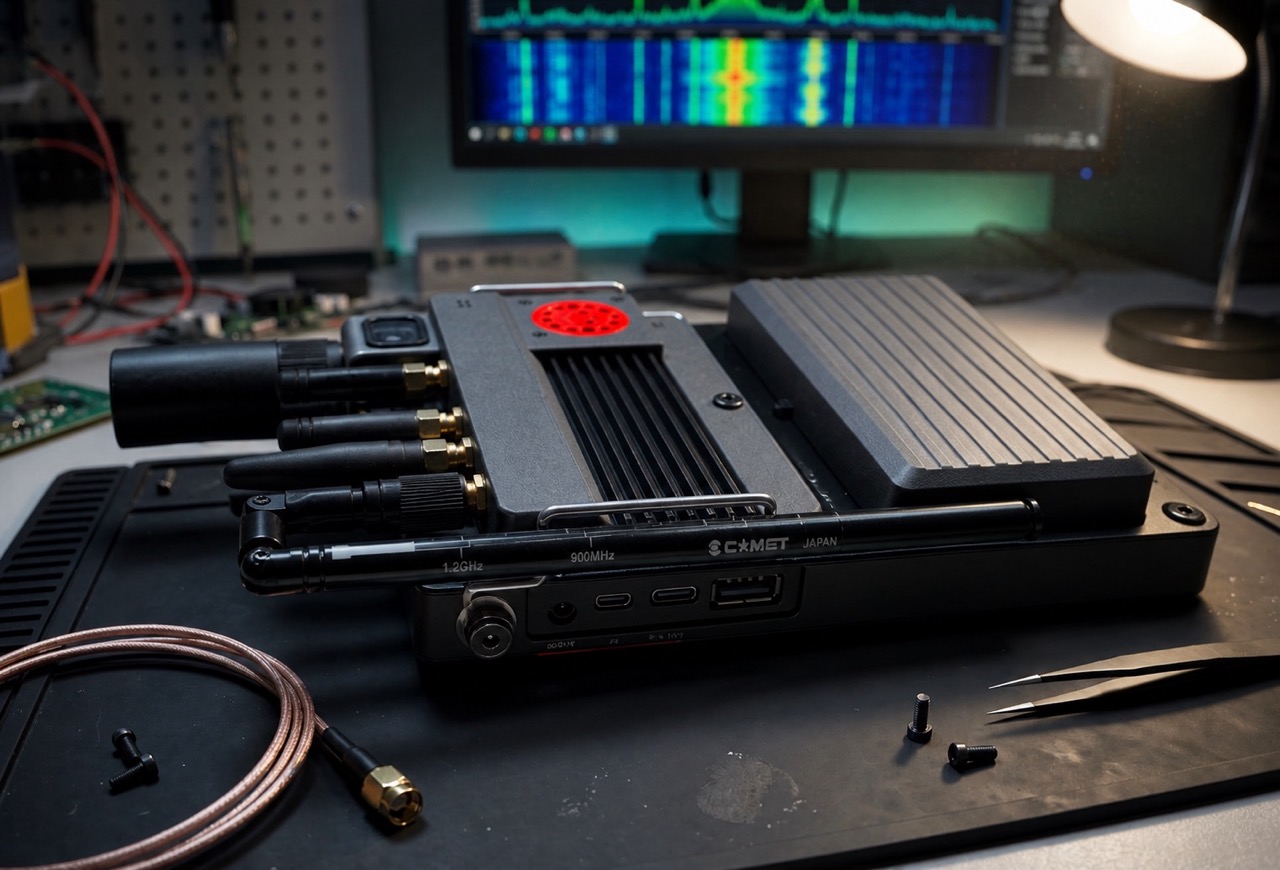
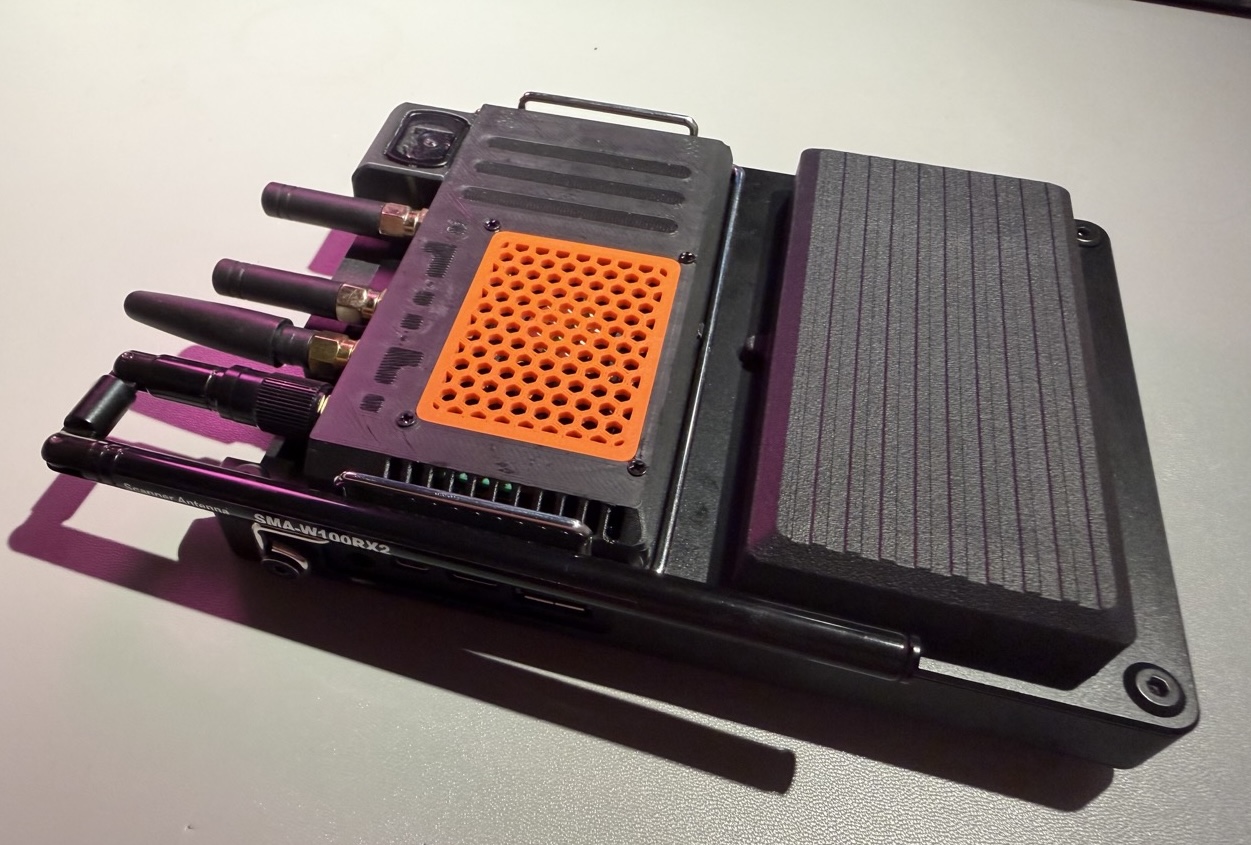
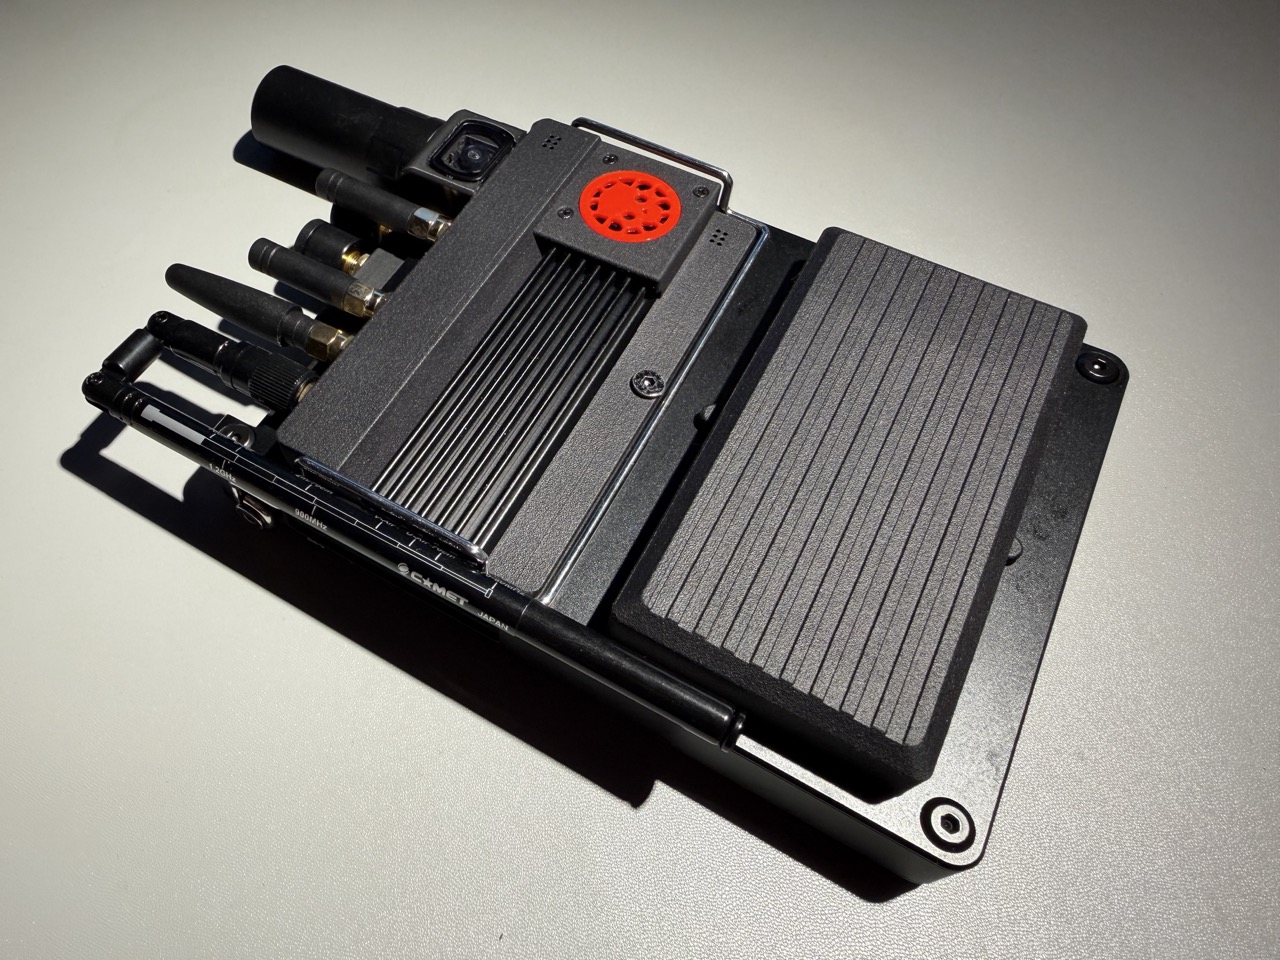
Essential (left/orange) vs Ultimate (right/red) Model
Both models share the same core design and features mentioned above, both have modular designs, but they differ in terms of materials, cooling solutions, and overall design philosophy. The Essential Model is designed to be more budget-friendly and easier to assemble, while the Ultimate Model offers enhanced a more polished aesthetic for those who want to take their uConsole experience to the next level.
| Feature | Essential Model | Ultimate Model |
|---|---|---|
| Heatsink | Off the shelf unit | Custom Designed and future proofed (slim) |
| Phsyical Profile | Bulky top casing | Slim Design |
| Casing | Higher risks with water splashes, venting from the inside | Fully sealed. venting from the outside the case, support passive cooling when fan is off |
| CNC | Requires 1 CNC | Requires 2 CNCs |
| 3D Pritning | All Printable at Home | Partially Printable at Home |
| Extreme Low Cost | Print all parts at home (upgrade parts later) | - |
| Minimum Cost | ~$40 for CNC + Printing at Home | ~$90 for CNC + MJF 3D Printing + Printing at Home |
| Maximum Cost | ~$40 for CNC + ~$35 3D Print Order | ~$90 for CNC + ~$35 3D Print Order |
| Grill Design | Customisable | Customisable |
| Modulear Support | Full modular support, but with a more basic design | Full modular support with a more polished design |
For personal use, no need a reseller and you can source replacement part - and it is long term supported, reproducible with no hard dependency on anyone.
Color Vartiations
It is possible to customize the color of the backplate, and the design files are provided for you to do so. Current alumnium finishging is available in Black, Silver and Titanium Silver.
Form and Function
The design of the Omega-Chassis backplate focuses on the following core pillars: power, thermal management, modularity, future proofing.
Battery Enhancement
I have many people asking about battery options. The Omega-Chassis is built to be incredibly flexible with your power setup, officially supporting three main configurations, and it works with both Essential build & Ultimate build:
-
HackerGadget NVMe Battery Board + 3x 18650s: Full compatibility for those looking to expand their battery capacity alongside their NVMe storage.
-
Stock Battery Board: Works seamlessly right out of the box with the stock uConsole battery board, requiring no major modifications.
-
LiPo Setups: If you are already running or prefer a custom LiPo power setup, the chassis accommodates that beautifully as well.
-
Screwless Removable Battery Cover: In the recent update, we have also added a screwless removable battery cover avaiable for both build options. It means you can remove the battery cover without any tools, making it easier to swap batteries or perform maintenance. And, of course it still support 3 cells!
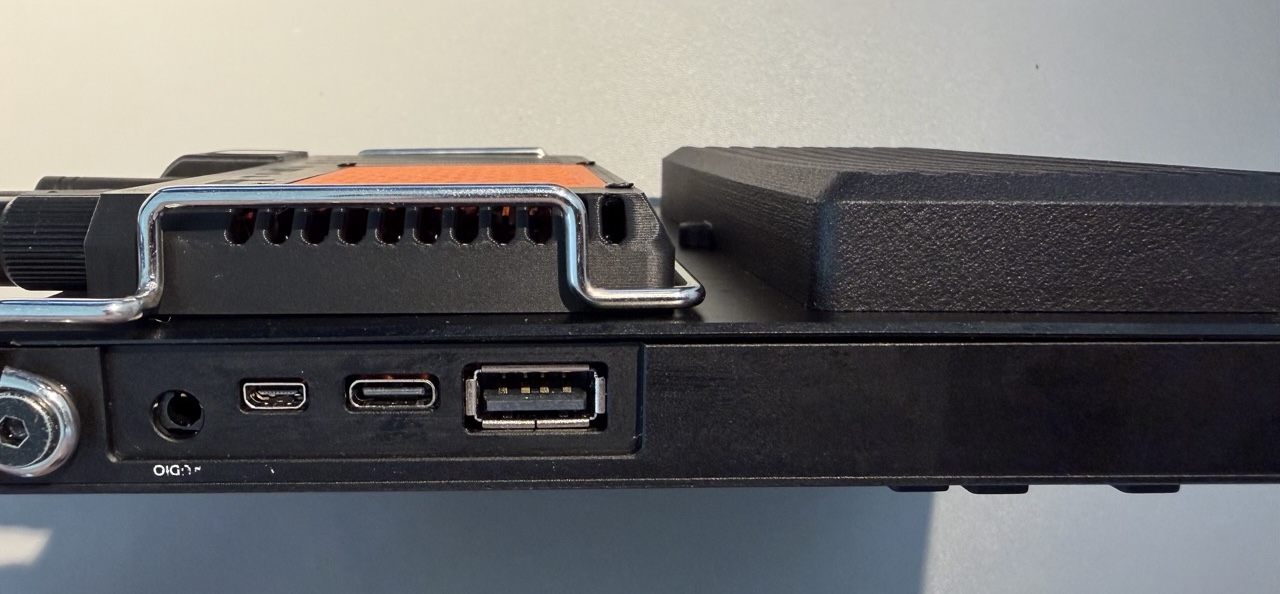
Active Cooling
The Compute Module CM4/CM5 is powerful, but it runs hot espeically when operating with high loads or AIOs receivers. Through a hybrid material design (heat-resistant plastics paired with aluminum), and a custom fan-curve, we can keep the CM5 at a stable 45-55°C under high load. The package will guide you through producing this custom cooling module. More importantly, the cooling module is designed to be future proof so that you don’t need to worry about buying a new chassis when the CM6 comes out. Note that, the installation of cooling fan requires you have the HackerGadget Adapter Board.
If you are happy with passive cooling, or don’t own a HackerGadget Adapter Board, the passtive cooling is effective as well. Then the active fan area will can be use for decorations or other future expansions.
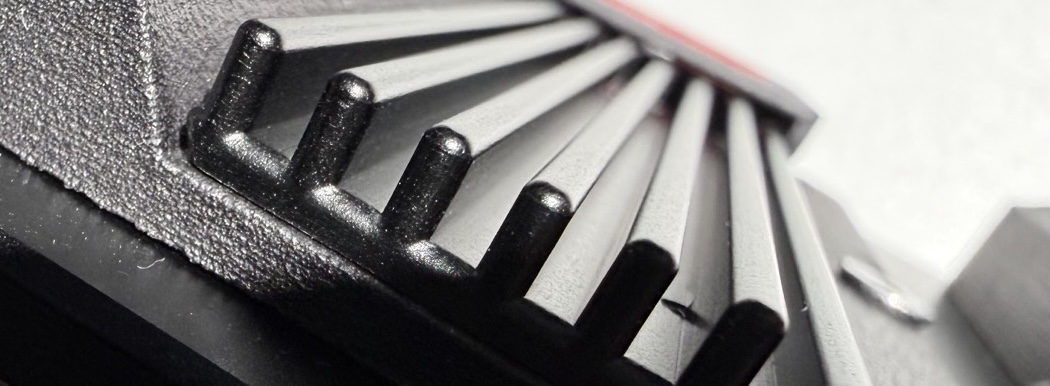
There are NO intermediate layers and the CPU is cooled directly through the heatsink. This means the heat release is efficient without another layer of material. The fan blows air through the side ways vents. The cooling surface against compute module is generic, thus it have the potential to be used for future compute modules.
Minimalist Modularism
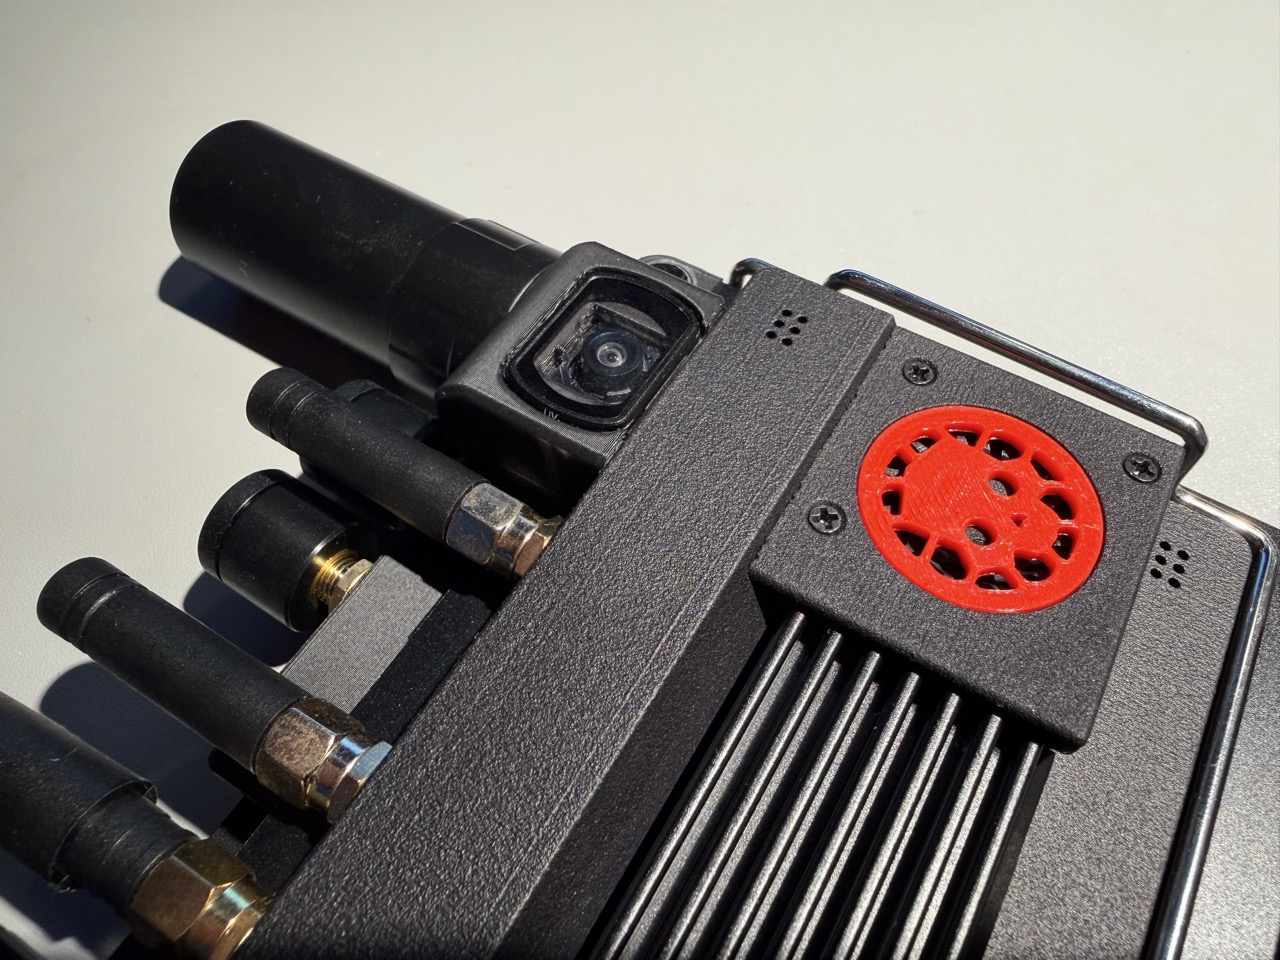
The chassis supports up to eight antennas (seven on top, one on the side), yet it remains compact. The design is modular, as you can decide how to best allocate the antennas based on your own preference. If antenna is not your favourite part, it is possilbe to create new adapters without compromising existing parts. (For example, exposing more IO Intefaces, or other interative interface modules).
Sound Improvement
Special matrix holes is part of the modules, it improves speaker clarity, it is now amplified through the backplate rather than muffed under the aluminum body.
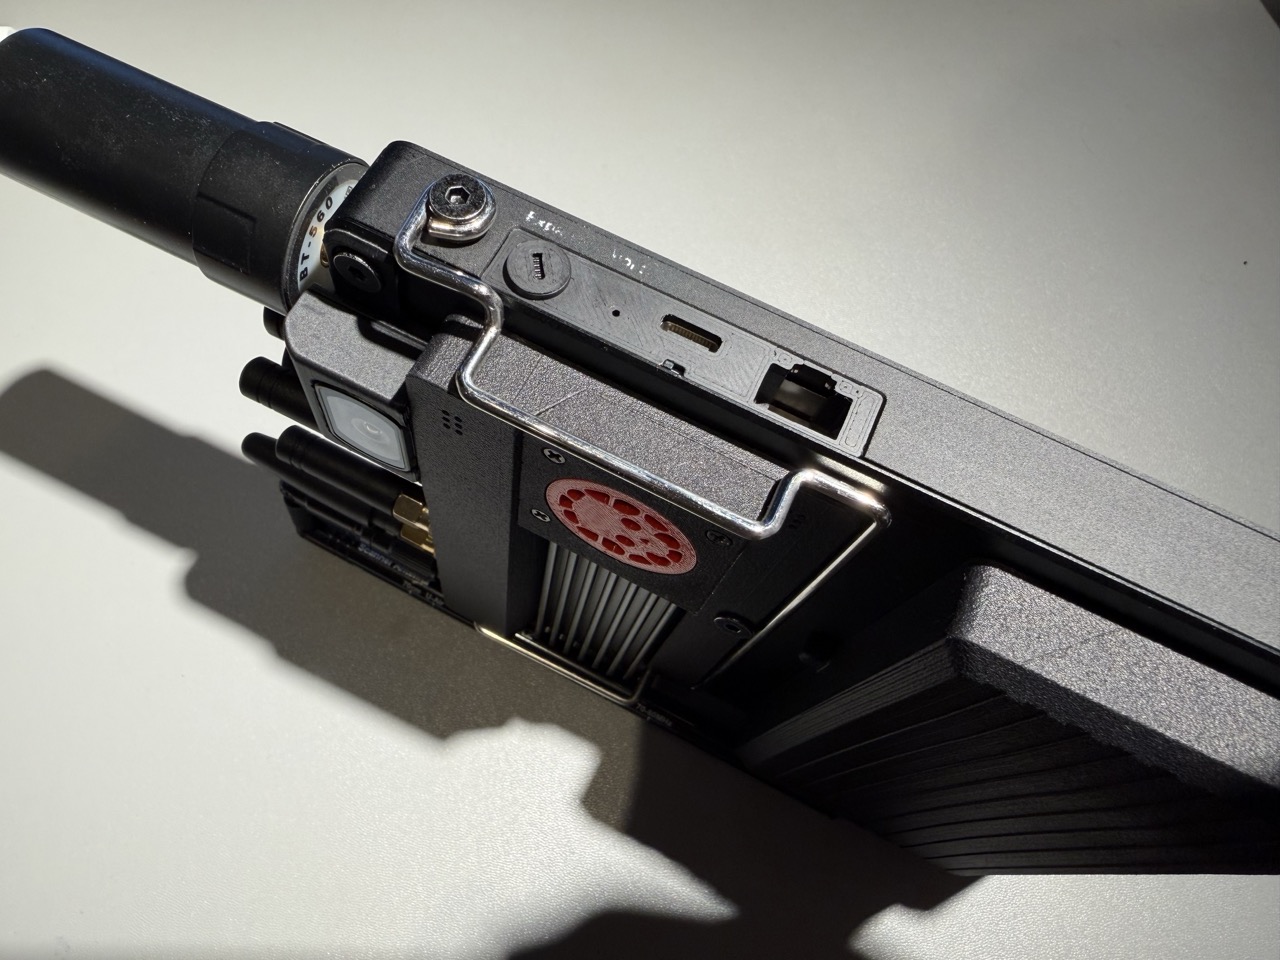
Camera Module
Optional slot for a Raspberry Pi Camera V3 or extra Micro SD storage. You get to choose whether to utlize 2 out of 10 atenna slots for the Micro SD card carrier or integrate the camera module.
The design supports 8 attennas with the camera module or Portable Micro SD Storage. Without these modules, it can support up-to 10 antennas.
For demonstration, mGBA Camera guide is provided to demonstrate the capabilities.
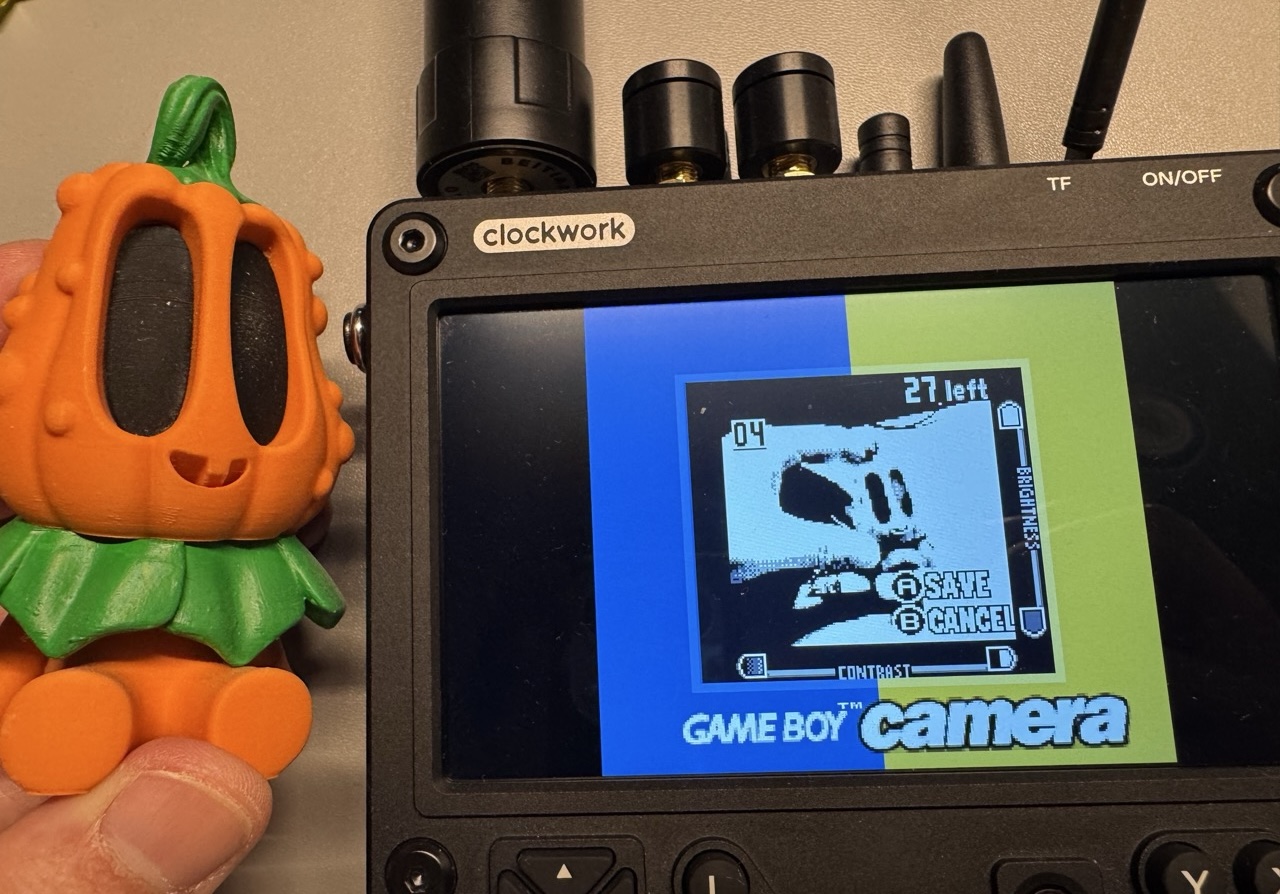
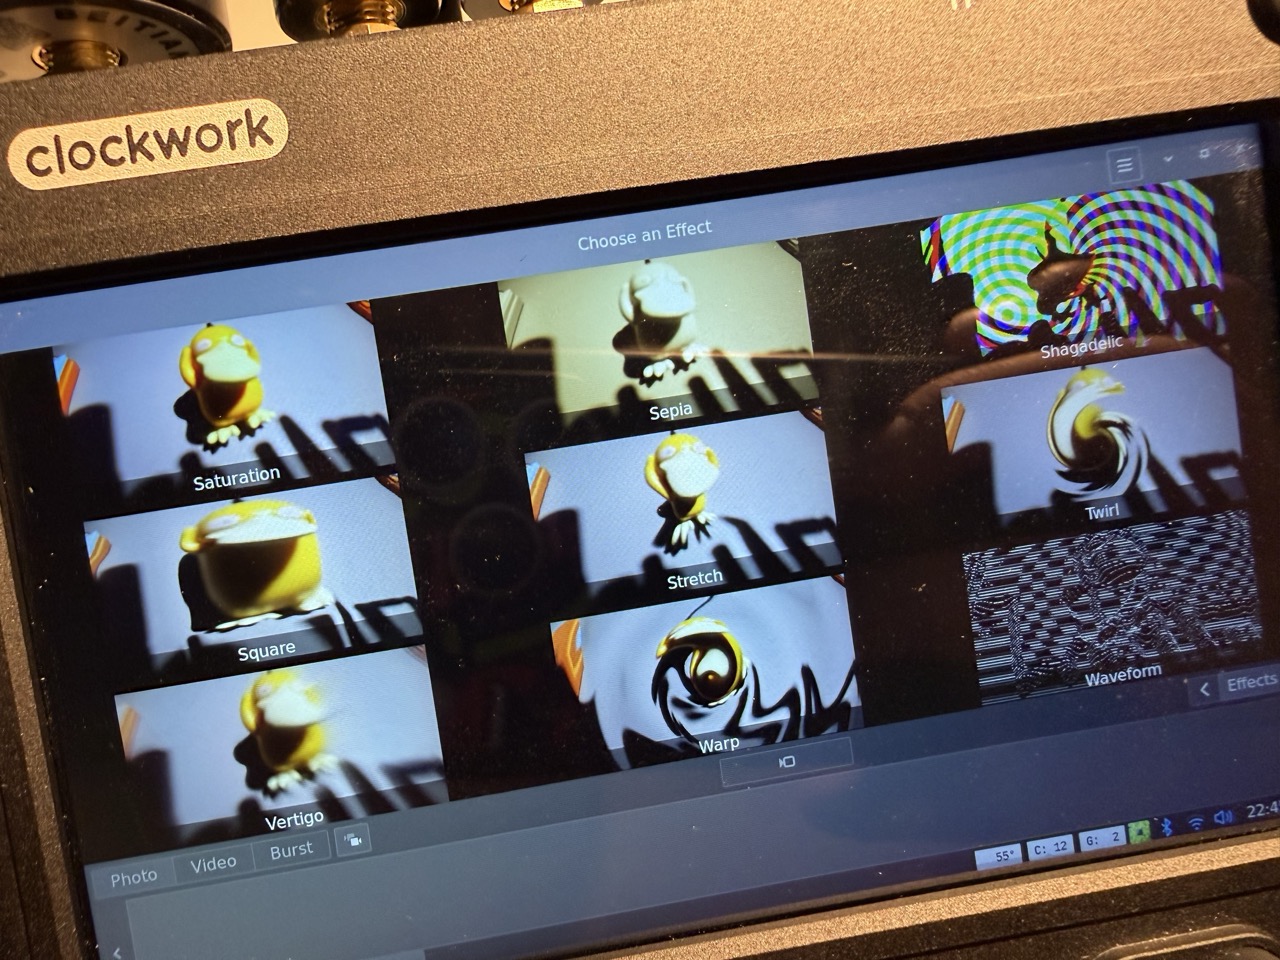
Or you can have some fun with the Linux Cheese Camera app, which is a fun way to take funny effect photos with the device. The camera module is compatible with DJI Pocket 3 magnetic lens protectors.
Alternatively, you can also replace the camera with a 2 slot Micro SD Card Carrier, which can be used for portable storage or even a swapable OS card setup.
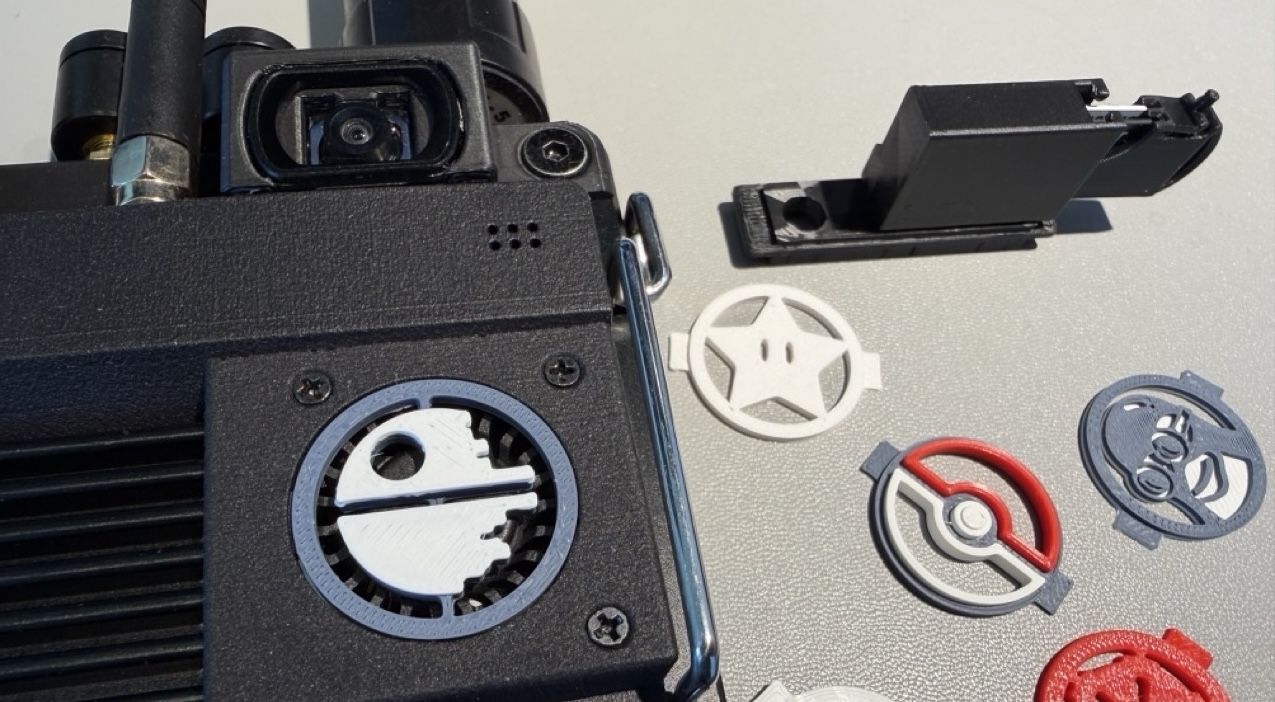
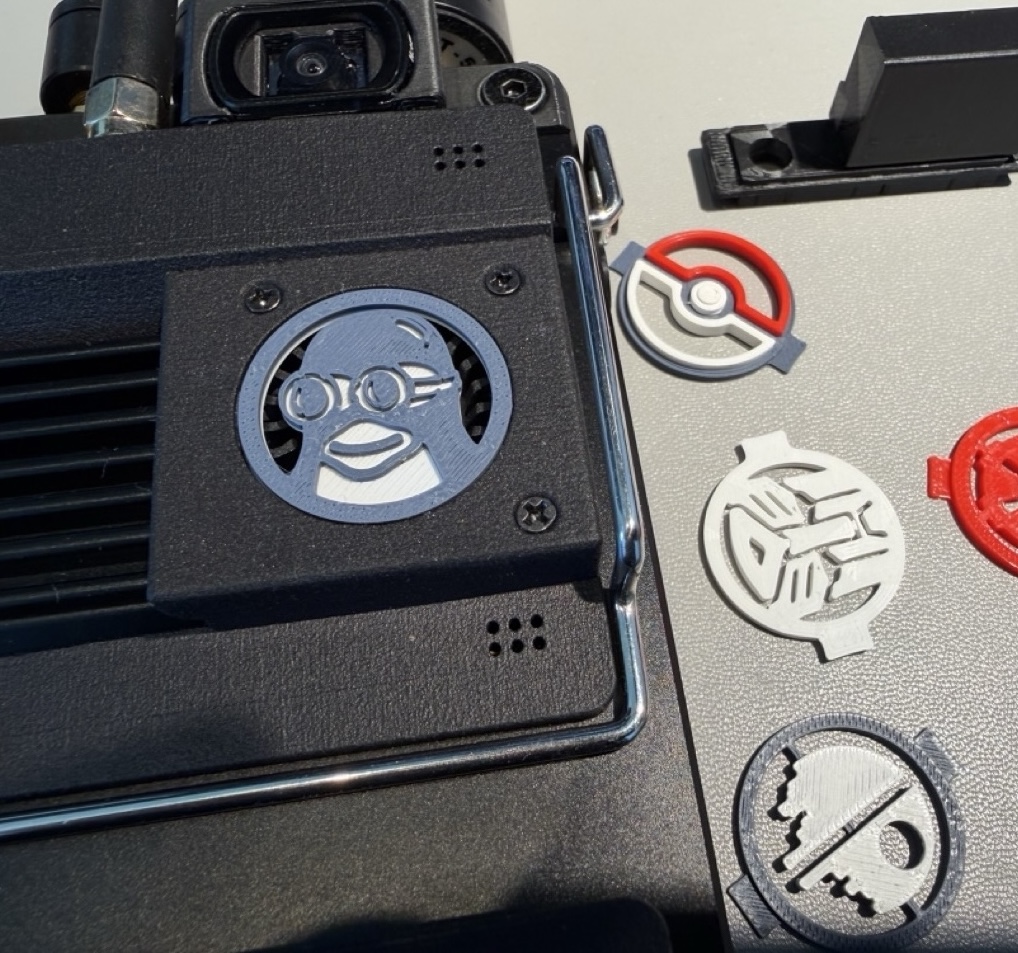
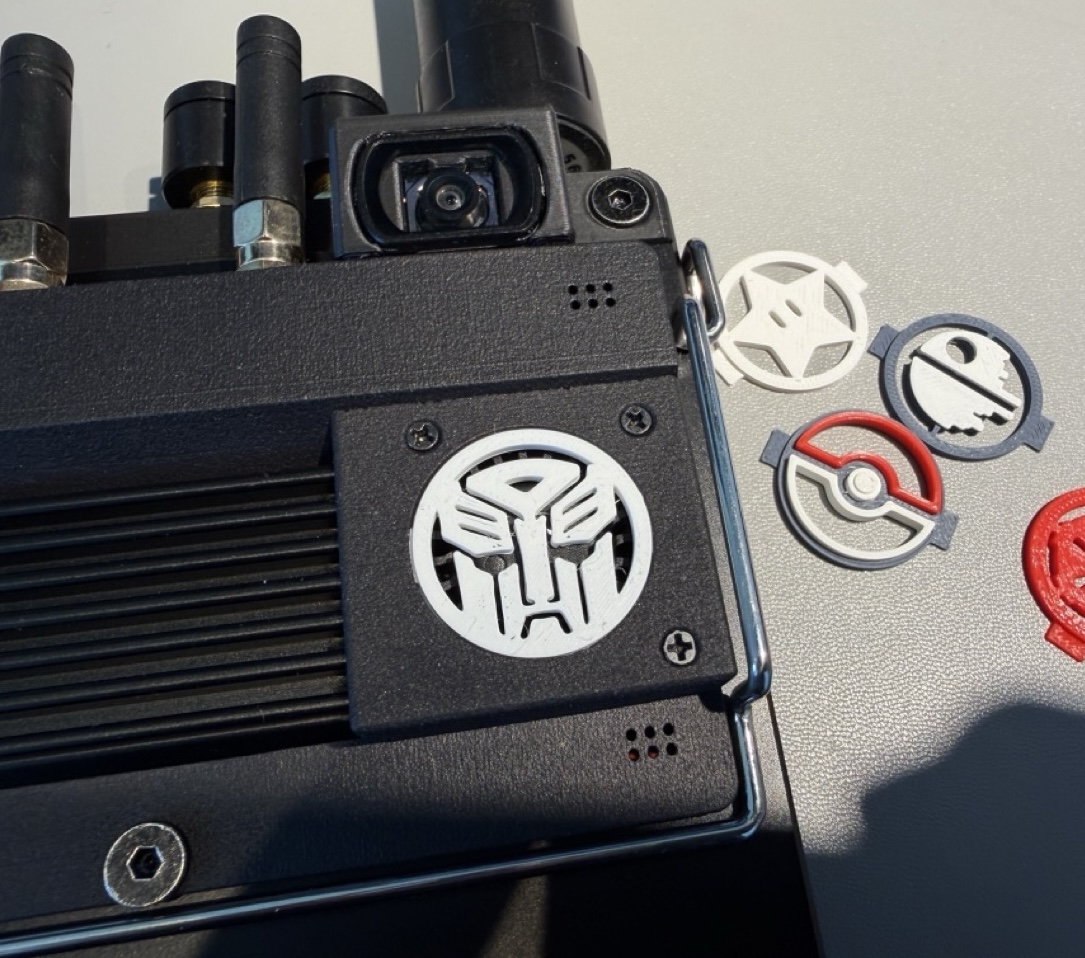
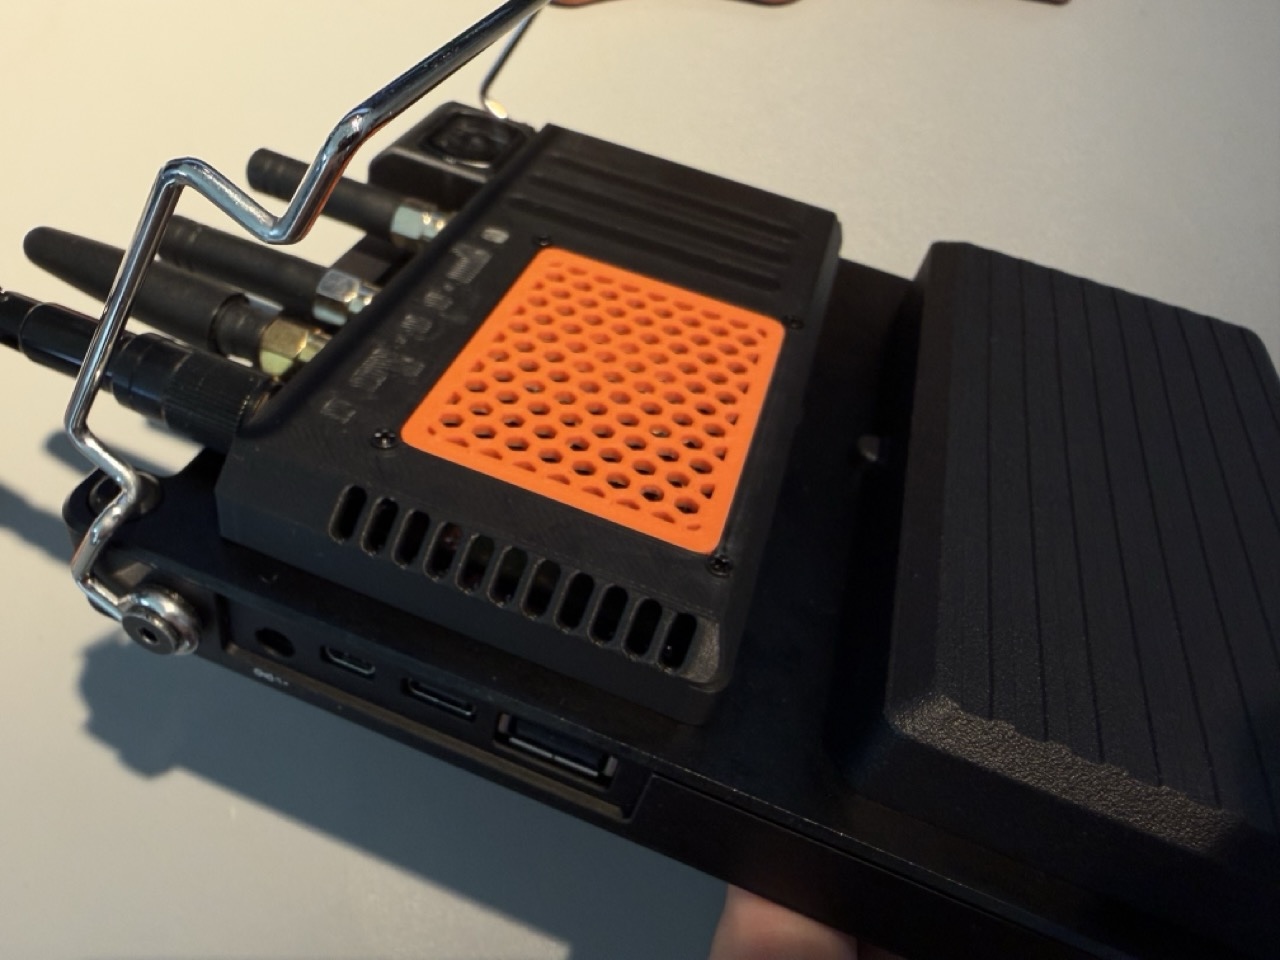
Custom Fan Cover
The cooling fan covers are costomizable to personalize the cyberdeck aesthetic. There are a number of examples and templates included in the package, and you can also design your own if you want to.
Ultimate build:

Essential build, also support swap grills:
Maintain the Original Aesthetic
The most important aspect is that even with all these upgrades, major form factor does not change. The uConsole still sits flat; with the correct antenna arrangement, you can minimize the need to taking on/off the atenna when you put the device in a bag.
Ultimate build:
Essential build, slighly buklier but still compact:
The “Build it Yourself” Model
I am often asked if I will organize a group buy for these kits. The answer is no, and the reason is efficiency.
Shipping and logistics for creativity are a distraction. Instead, I’m releasing the Omega-Chassis as a “distributed manufacturing” project. When you purchase the Omega-Chassis package, you get the design files and a complete guide on how to order your own parts directly from fabricators like JLC (economically shipping parts directly to your home). This way, you can get your parts faster, and you can also choose to customize certain aspects of the design if you want to. More importantly, this can be reproduced without another re-seller.
The package is designed to be as DIY-friendly as possible, with clear instructions and support for builders of all skill levels. For the CNC machined aluminum parts, the design files are optimized for manufacturing, and the guide will walk you through the process of ordering from a pricing optmized ordering process. If you have 3D Printers, some parts can be self-printed at home.
For the builders, there is some light soldering involved to get the three battery setup running. However, if you aren’t comfortable with a soldering iron, the kit includes a module that supports the standard dual-battery setup. You can upgrade incrementally as your confidence grows.
Additional Parts Required
These will need to be purchased sepearetley. The Build guide provide details, Aliexpress, Amazon links and photos.
- Fasteners: M2, M2.5, and M4 screws
- Electronics: Raspberry Pi Fan, 15cm RPi cable, JST wiring.
- IPEX cables for antennas
- Compatable Battery contact points (if you want to go with the 3x18650 setup)
- RPi Camera Lens, Magnatic Lens Protector (DJI Pocket 3 Compatible).
- 2mm CPU Cooling thermal pads
- HackerGadget Adapter Board (required for cooling fan installation, without it you may lose Camera feature & Active Cooling feature).
Build your own endgame uConsole, Purchase the Omega-Chassis Design & Build Guide