uConsole Keyboard Diffuser
The Motivation
The ClockworkPi uConsole is a fantastic device, but one area that has always felt a bit underwhelming is the amount of force required to register a key press; the backlighting is also quite uneven, with some keys appearing much brighter than others.
Note: The original diffuser design requires significant Z-axis clearance for proper light diffusion. Given the limited z-space, a completely redesign with light-guide solution would be ideal - but that’s not cost effective! My goal was to respect the original design constraints while utilizing the available space to improve the tactile response of the keys, and manipulating light leakage to improve backlighting consistency.
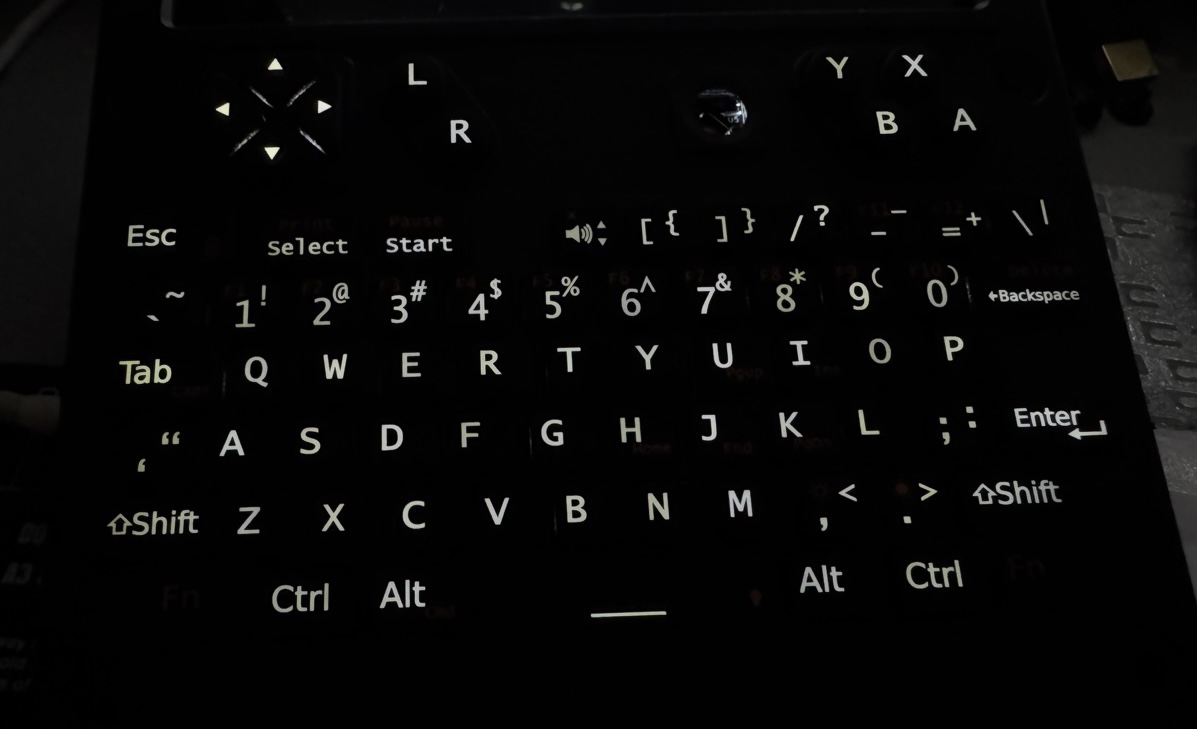
This is what the original diffuser effect looks like:

To address this, I re-designed and 3D printed a custom LED diffuser that sits between the keypad and the PCB.
Download & Purchase the 3D Model
The models can be purchased and downloaded from the store.
The Design and Experimentation
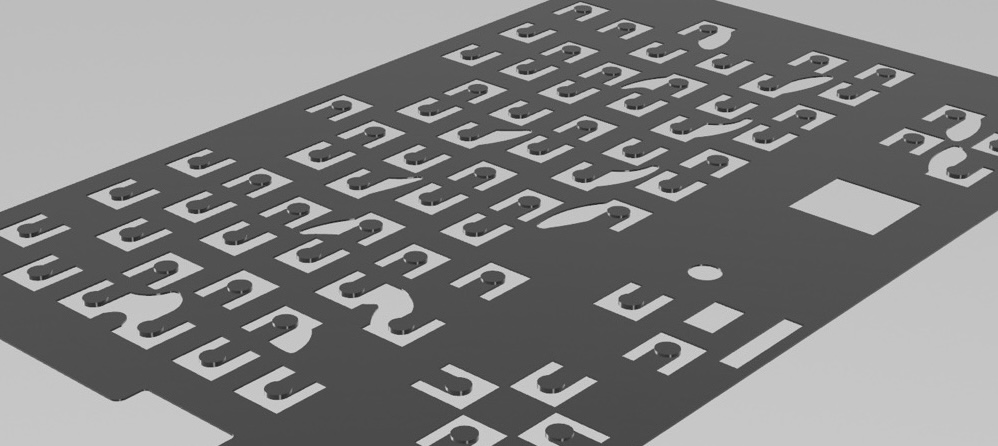
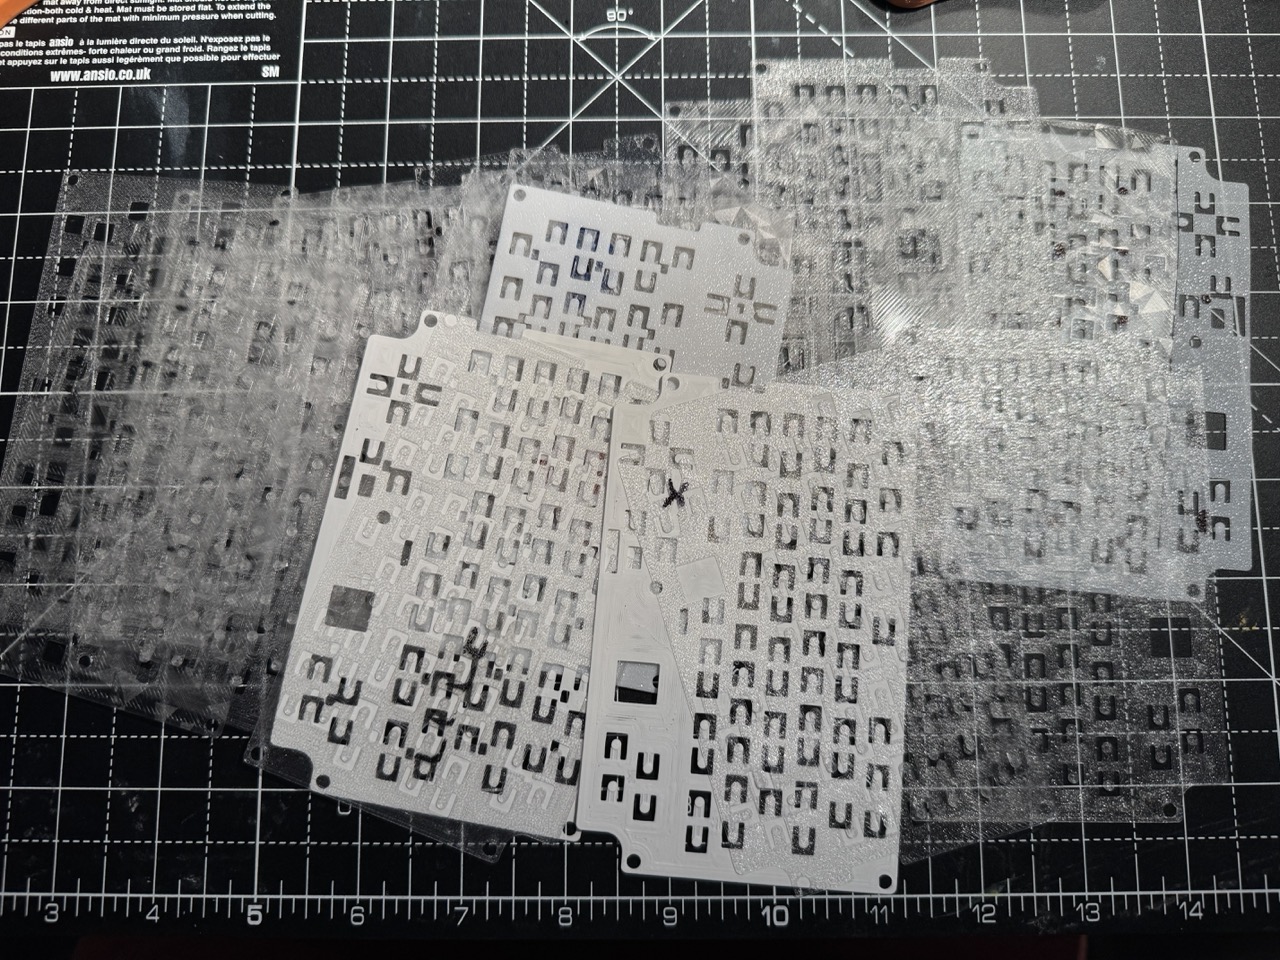
I started by experimenting with the thickness required between the keypad cover and the PCB, then designed a diffuser to fit snugly within that space. I experimented with different materials and thicknesses to find the right balance between key response and light diffusion. I went through at least 20+ iterations and over 70+ test prints, a number of weeks real usages before finalizing the design.
The Result
The keys now require just the right amount of force to actuate; the spacebar registers reliably even when pressed off-center, and the backlighting has improved backlighting even across all keys. It is hard to describe the key touches, but it feels that I can quick typing with more confidence and less fatigue.
Note: This modification won’t make the backlighting “perfectly” even, but it will improve the overall consistency. Some keys may appear slightly yellowish due to reflections from the black circuit board.
Here is the final result after the modification:
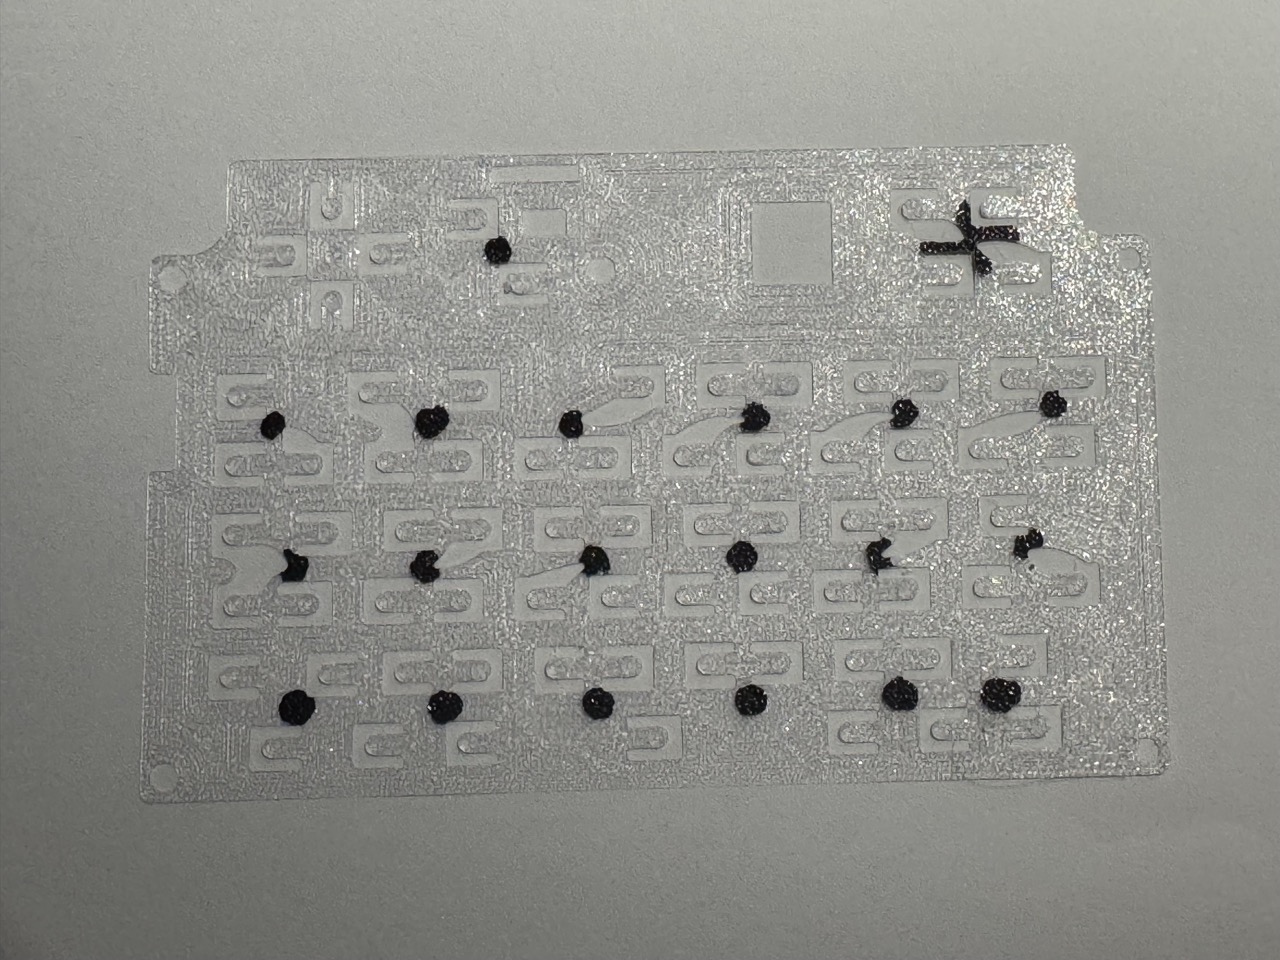
How to Mark the Keys
You will need an “Oil-Based Permanent Marker” (i.e. Sharpie) to mask the LED areas. To find the correct positions, place the original diffuser underneath as a template and draw a 5mm circle over each LED location. Note that the gamepad (YXBA) keys require a “cross shape” marking as shown below to achieve the best lighting balance.
Warning: Be careful not to draw over on top of the orignal diffuser. Permanent marker ink is diffcult to remove.
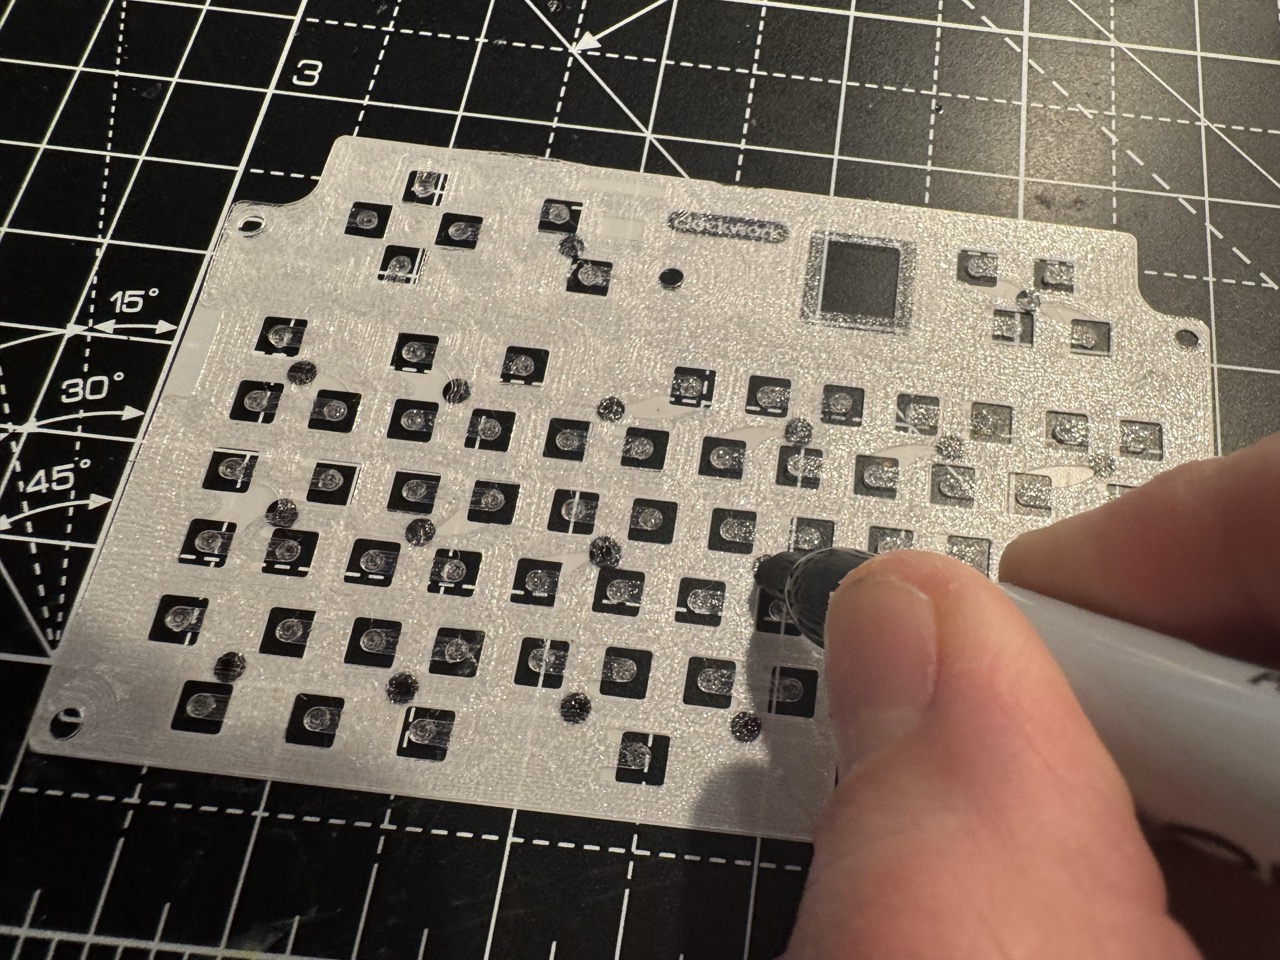
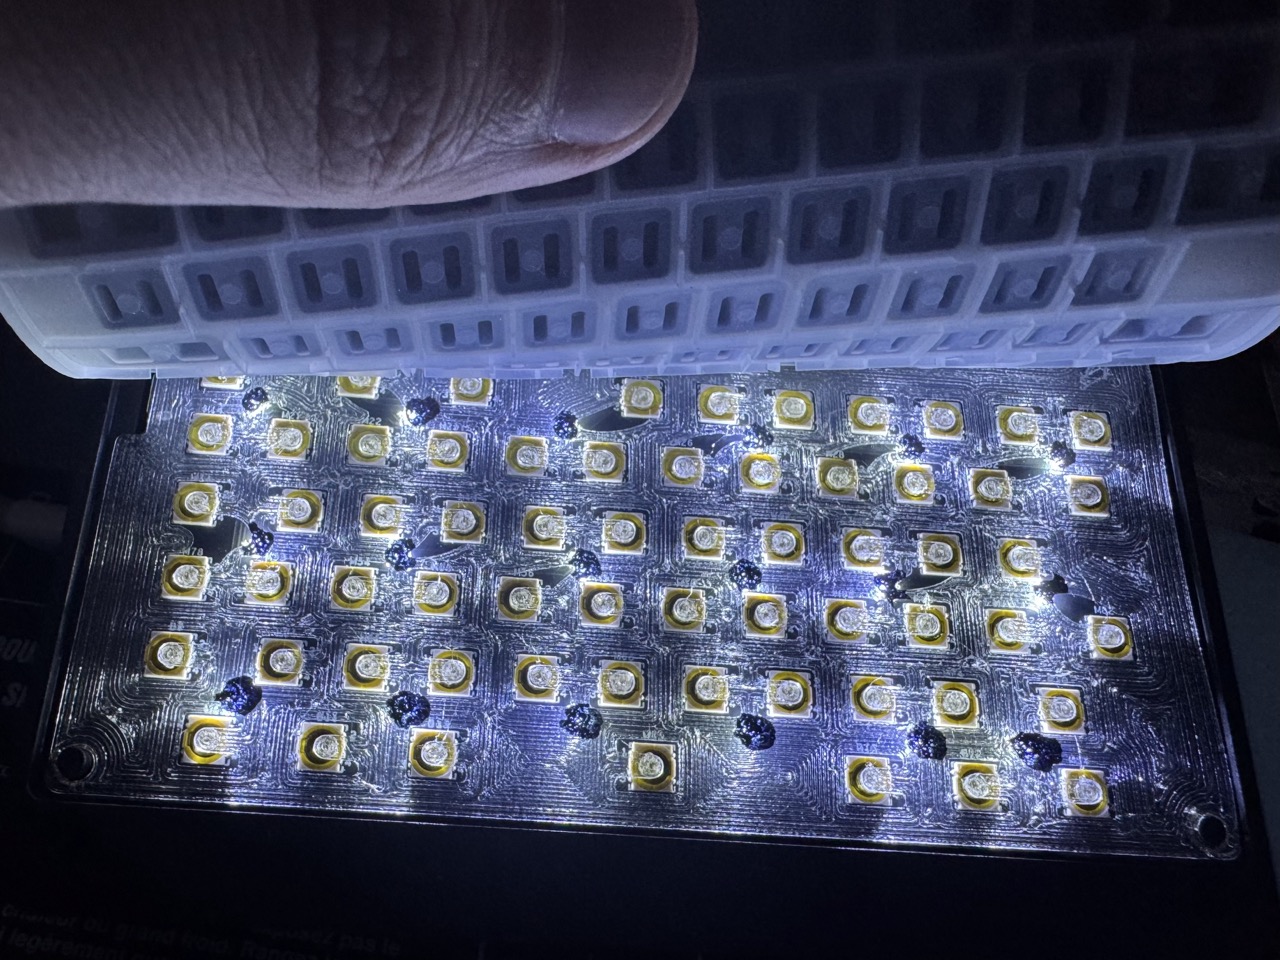
Finally, place the diffuser back onto the keyboard PCB and turn on the LEDs. Dab the marker on any spots where the LED isn’t fully covered or the ink layer is too thin to block the light. Use this opportunity to touch up any areas with excessive light leakage where the light isn’t fully blanced.
Once you are satisfied with the result, install the trackball shim. This reduces the trackball’s play and minimizes noise and vibration against the metal plate.
Note: This shim is not exactly the same as the one shared in the uconsole-qmk firmware repository; it has been optimized for this 3D printed diffuser.
Printing the Diffuser
Recommended Filament:
- Transparent or Clear 95A TPU
- White 95A TPU (may result in reduced brightness)
Recommended Print Settings:
- Print Precision: 0.2mm
- Layer Height: 0.08mm
- Infill: 100%
- Build Plate: A smooth build plate yields the best results, though textured plates are functionally sufficient.
If you encounter stringing with the TPU, try reducing the print temperature or drying the filament.
Once printing is complete, carefully remove the diffuser from the build plate. These are small, delicate parts; the safest method is to slowly peel them off from top to bottom, gently working around the edges. 95A TPU is durable and should withstand a reasonable amount of force.